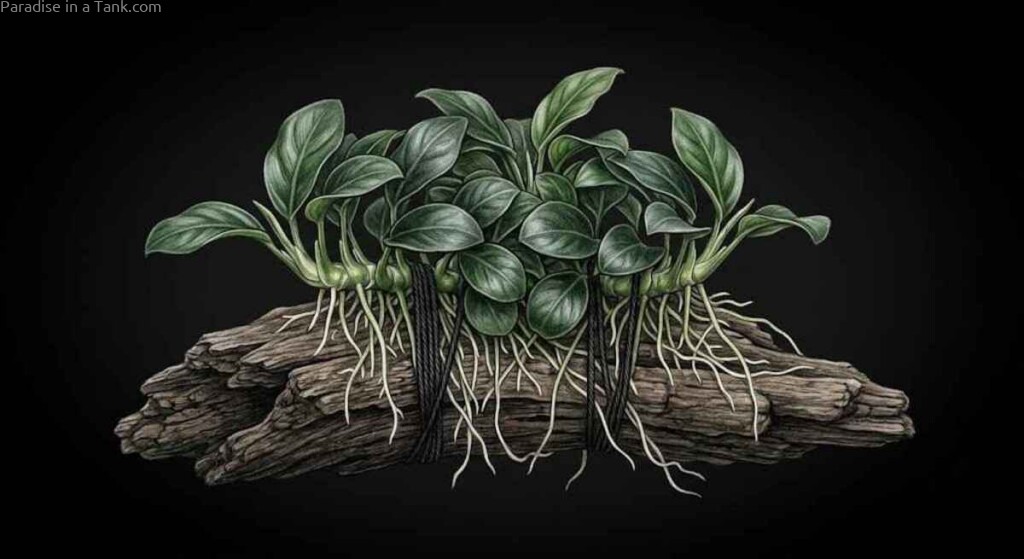
Why Anubias Rot in Gravel and Sand
To plant Anubias successfully, you must never bury its horizontal green stem—known as the rhizome—beneath gravel or sand. Anubias absorbs waterborne nutrients through its rhizome and feeder roots; burying the rhizome starves it of oxygen and water flow, triggering anaerobic decay and total rhizome rot within 7–14 days. Secure the plant directly to hardscape like driftwood or rocks using aquatic-safe cyanoacrylate gel or fishing line, or anchor only the white feeder roots in substrate while keeping the entire thick green rhizome elevated completely clear of sand or gravel.
The Anatomy of Rhizome Rot: Biological Causes of Anaerobic Decay
Understanding why Anubias melts into a soft, foul-smelling mush requires a close look at its botanical structure. Unlike typical stem plants that draw nutrients almost exclusively through deep subterranean root systems, Anubias is an epiphyte natively adapted to cling to rocks, roots, and riverbanks across Western Africa. The core engine of this plant is its rhizome—a thick, horizontal modified stem from which leaves grow upward and white roots extend downward.
When you shove this vital green organ under dense aquarium gravel or fine sand, you instantly isolate it from vital water circulation. Oxygen levels around the subterranean rhizome drop to zero, creating a localized anaerobic pocket. Opportunistic decay bacteria, including various Aeromonas and Pseudomonas strains, immediately colonize the suffocating plant tissues. Within a few days, the firm green flesh turns brown, liquefies, and releases a distinct rotting odor into your water column. Once rhizome rot takes hold, the vascular pathways collapse, causing bright green leaves to pop off at the petiole base until the entire plant disintegrates. To build a thriving aquascape around these resilient species, brush up on overall lighting, water chemistry, and species requirements in our comprehensive Anubias care guide.
Feeder Roots vs. Rhizomes: What Can and Cannot Be Covered
To plant this African epiphyte safely, you must clearly distinguish between its two primary underground and exposed structures. Beginners frequently confuse feeder roots with the central rhizome, leading to fatal planting mistakes.
- The Rhizome (CANNOT BE COVERED): This is the thick, firm, horizontal green body where every leaf stem originates. Think of it as the central nervous system and nutrient pipeline of the plant. It requires direct exposure to oxygenated water movement and ambient light at all times.
- The Feeder Roots (CAN BE COVERED): These are the branching, fibrous, off-white or light brown tendrils that shoot downward from the underside of the rhizome. Their main jobs are physically gripping rough surfaces and drawing dissolved nitrates, phosphates, and micro-minerals from organic debris.
- The Root Hairs (CAN BE COVERED): Microscopic, velvety filaments growing along the feeder roots that secure a firm biological grip on lava rock or wood grain over several weeks.
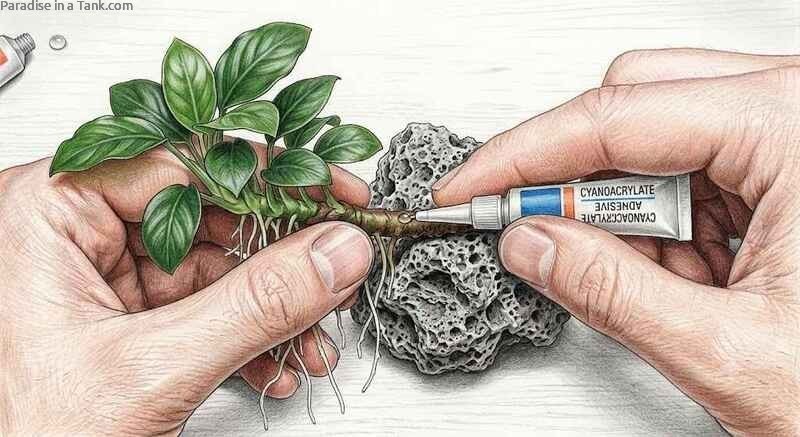
Method 1: Gluing Anubias to Hardscape
- Adhesive Selection: You must use 100% cyanoacrylate gel superglue. Standard liquid superglue runs off too quickly and creates messy white smears across your aquascape, whereas gel formulations stay put and cure safely under water without leaching harmful toxic chemicals into your aquatic environment.
- Step-by-Step Glue Process: Follow this step-by-step technique to secure your plants without damaging delicate green tissue.
- Remove the plant from its plastic pot and gently peel away every trace of rockwool under lukewarm running water.
- Carefully inspect the rhizome for brown or mushy spots, trimming away dead roots with sharp, sanitized aquascaping scissors.
- Take a paper towel and gently pat dry the specific spot on the rhizome you plan to anchor, as well as the target surface on your rock or driftwood (a bone-dry surface ensures an instantaneous bond).
- Apply two or three small, bead-sized drops of cyanoacrylate gel directly onto the dried rhizome or hardscape surface.
- Press the rhizome firmly against the hardscape for 10–15 seconds, taking care not to crush or pinch the central stem.
- Submerge the hardscape back into the aquarium or mist it immediately; water acts as an instant catalyst that cures cyanoacrylate gel in seconds, turning it into a stable, non-toxic inert plastic bond.
Method 2: Tying Anubias with Thread and Monofilament
- Cotton Thread Method: Raw, 100% unbleached cotton sewing thread is an ideal temporary anchor for rough surfaces like porous lava rock or textured driftwood. Over 3–6 weeks, the plant’s feeder roots naturally wrap around the hardscape fibers, while the organic cotton thread slowly breaks down and dissolves naturally in the water column without requiring any manual removal.
- Fishing Line Method: Standard 4–6 lb clear monofilament fishing line is the ultimate choice for large, heavy specimen plants attached to smooth surfaces like polished slate or dense mopani wood. Because clear nylon line does not rot or degrade over time, it holds massive multi-leaf rhizomes permanently in place against strong current flow without drawing visual attention to itself.
To tie your plant using either material, wrap the line firmly around the bare sections of the rhizome between leaf petioles. Loop it around the wood or stone 3 to 4 times, applying just enough tension to prevent the plant from floating away, then tie off a snug double knot on the underside of your hardscape. Avoid cinching the line down too tightly, as excessive force can slice straight through the fleshy vascular skin of the rhizome and invite rot.
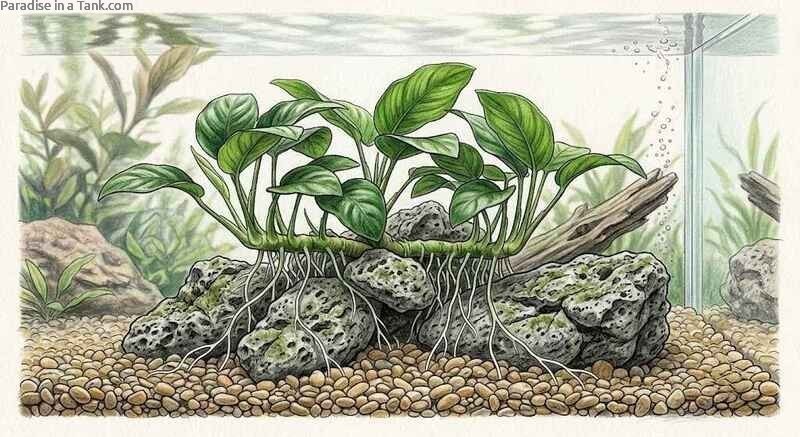
Planting Anubias Safely in Gravel or Sand
| Planting Strategy | Target Substrate | Rhizome Position | Long-Term Risk Profile |
|---|---|---|---|
| Root-Only Insertion | Coarse Gravel or Heavy Sand | Suspended 0.5 inches completely above the substrate line. | Low, provided gravel does not settle over time and bury the stem. |
| Rock Anchor Technique | Fine Sand, Aquasoil, or Pebbles | Glued to a small pebble that rests entirely on top of the bed. | Zero risk; guarantees maximum airflow and complete stem exposure. |
- The Root-Only Method: If you want the traditional look of an rooted plant growing directly out of your substrate, trim the long feeder roots to roughly 2 inches in length. Using stainless steel aquascaping tweezers, grab the tips of the white roots and push them deep into your gravel, pulling the plant down gently. Once anchored, pull the plant slightly upward until the entire horizontal green rhizome sits clearly above the substrate line, with only the white roots extending into the gravel bed.
- Rock Anchor Technique: The absolute safest way to “plant” Anubias in sand or fine aquasoil is to glue the rhizome to a small, heavy pebble or piece of lava rock roughly the size of a marble. Place the pebble directly on top of your substrate bed. Over time, the plant will push its feeder roots down into the substrate to gather nutrients, while the heavy pebble anchor guarantees the vulnerable main rhizome remains safe from anaerobic smothering.
Whether you choose tiny dwarf variants like ‘Nano’ or sprawling giant cultivars like ‘Heterophylla’, keeping that green rhizome exposed to clean water flow is the single rule that separates a dying plant from an aquascape centerpiece. Explore the most resilient Anubias varieties for home aquariums to find the perfect leaf shape and size for your next setup.