Why Aquarium Moss Doesn’t Belong in Substrate
Aquarium mosses lack true roots and cannot absorb nutrients through dense gravel or sand substrates. Burying moss stems causes trapped fish waste, fecal matter, and decaying organic debris to smother the delicate fronds. To flourish, moss requires clear water flow across its leaves and raw hardscape surfaces like driftwood or stone to anchor its rhizoids securely.
If you take a handful of fresh green moss and push it down into your substrate like a stem plant, you are setting up a silent timer for total decay. Unlike standard aquatic plants, mosses are bryophytes. They do not possess a traditional root structure designed to dig into dirt, pull minerals from soil, or anchor against heavy gravel pushes. Instead, they rely on microscopic hair-like structures called rhizoids. These tiny gripping filaments are designed by nature to latch onto rough external surfaces—rock faces, submerged tree bark, and porous wood roots—not to burrow under heavy sand.
When you shove moss under substrate, you immediately choke off its access to vital ambient lighting. Even worse, the physical weight of gravel grains breaks the fragile micro-fronds, severing the circulatory paths of the plant. Within days, the buried sections turn yellow, then brown, and finally dissolve into a grey sludge that degrades your water quality.
Smothering & Debris: How Gravel and Sand Trap Detritus
The primary killer of buried moss is internal suffocation caused by trapped waste. Your aquarium is a constant generator of organic refuse. Fish poop, uneaten flake food, dead plant leaves, and floating dust continually settle toward the bottom of the tank.
When moss sits flat on or inside gravel:
- Detritus Trapping: High-density gravel beds act as a mechanical sieve, filtering solid waste straight into the fine weave of the moss fronds.
- Bacterial Overgrowth: Heterotrophic bacteria swarm the trapped waste to decompose it, consuming localized dissolved oxygen and creating dead zones around the moss.
- Cyanobacteria & Algae Fires: As trapped poop rots inside the moss mat, localized pocket spikes of dissolved organic carbon and phosphate trigger aggressive blooms of blue-green algae (cyanobacteria) or black brush algae directly on the plant tissue.
- Rhizoid Rot: Deprived of continuous, sweeping water currents, the plant’s structural filaments rot away, causing the entire patch to detach and float into your filter intake.
If you want to understand how different moss species react to these environmental pressures, review our overview of popular aquarium moss varieties to select the strongest strains for your specific hardscape setup.
Method 1: Gluing Moss to Hardscape (The Dry Start Method)
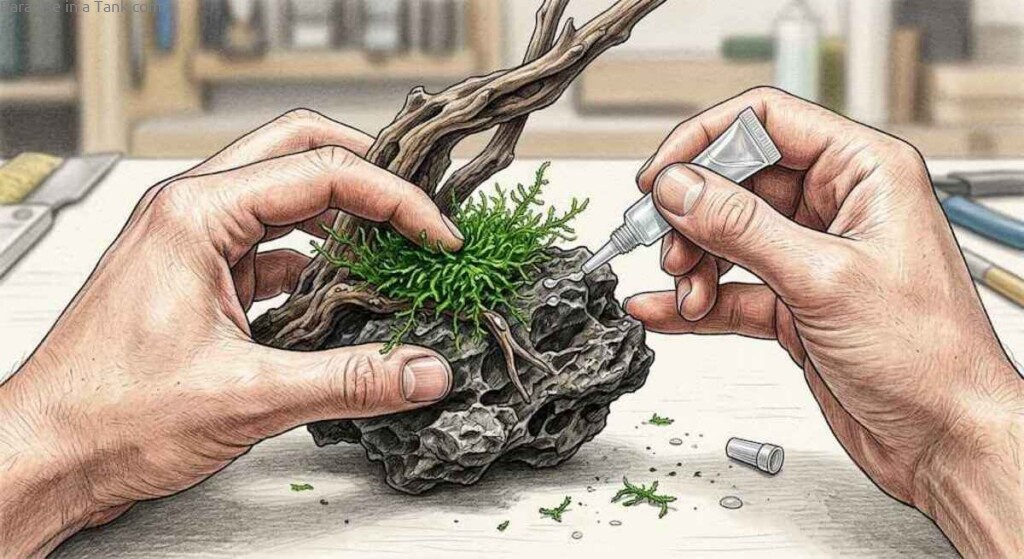
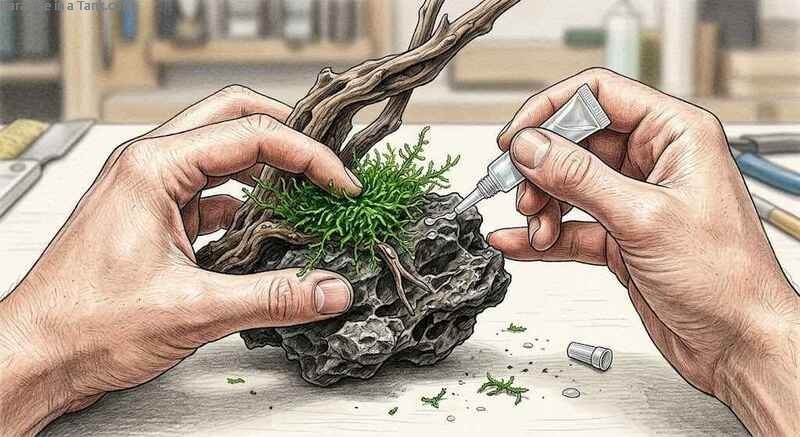
Using instant adhesive is the fastest, most effective, and cleanest secret used by modern aquascapers to secure moss onto complex hardscape. It eliminates hours of tedious tying and guarantees your plants stay exactly where you position them, even under high water flow.
Choosing the Right Glue: 100% Cyanoacrylate Super Glue Gel
You cannot just grab any standard craft adhesive off the shelf. You must use pure 100% Cyanoacrylate in a gel formulation. Cyanoacrylate reacts with ambient humidity to cure instantly into an inert, non-toxic acrylic plastic that is completely safe for delicate fish, shrimp, and beneficial nitrifying colonies like Nitrosomonas and Nitrobacter.
Always choose the “Gel” variant rather than the liquid version. Liquid super glue is runny, uncontrollable, and will bleed out across the wood grain, turning your natural dark hardscape into an unsightly white, chalky mess. Gel glue stays precisely where you dab it, filling in micro-crevices on rock surfaces and curing rapidly upon moisture contact.
Application Technique
To achieve a natural, seamless look without visible white glue spots, work with thin, sparse layers.
- Prep the Hardscape: Pull your wood or stone out of the tank so it is damp, but not dripping wet. Pat the targeted attachment zone dry with a paper towel.
- Dab the Gel: Apply a tiny, pinhead-sized dot of gel glue to the wood or stone. A little goes a very long way; using large globs will bleed through the fronds and turn white underwater.
- Layer Thinly: Take a very small tuft of moss—no thicker than a single layer of strands—and press it gently onto the glue dot for 3–5 seconds.
- Mist Immediately: Lightly spray the glued area with clean water using a spray bottle. Moisture triggers the cyanoacrylate to polymerize and lock the moss down hard.
Do not heap thick, dense clumps of moss on top of the glue. The bottom layer of a thick wad will die from light starvation, causing the entire upper mass to peel off and float away weeks later. Keep it thin, bare, and flat.
Method 2: Tying Moss to Branches and Roots
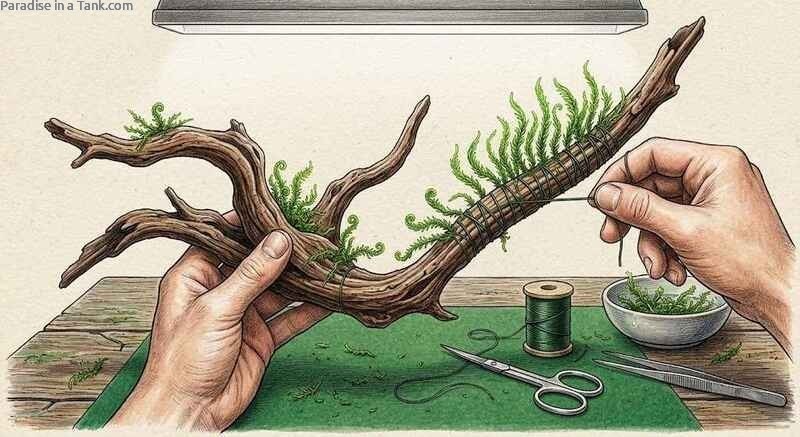
Tying moss with line or thread is the classic aquascaping technique. It is ideal for sweeping branches, intricate bonsai tree structures, and large volcanic rocks where glue might leave visible residue.
Cotton Thread: Best for Temporary Holds
Cotton thread is an ingenious tool for natural hardscape attachment because it is entirely biodegradable. Standard sewing thread made from 100% natural cotton holds the moss firmly against rough wood for approximately 14–21 days.
During these three weeks, the moss responds to ambient lighting and water parameters by extending new rhizoids directly into the microscopic pores of the wood grain. By the time the underwater environment naturally breaks down and dissolves the cotton thread, the moss has anchored itself permanently to the hardscape. This leaves behind a completely clean, thread-free, lush green branch. Match the thread color to your moss—dark green or brown thread vanishes into the background instantly.
Fishing Line: Best for Permanent Holds
For smooth, non-porous surfaces—such as polished river stones, glass backings, or heavy slate—rhizoids struggle to gain a deep mechanical grip. In these situations, or when working with weeping moss species that grow downwards and exert heavy gravitational drag, temporary cotton thread will break before the moss is fully secure.
Use clear, low-poundage monofilament fishing line (2–4 lb test). Monofilament does not dissolve, rot, or lose tension under water. Wrap the line firmly around the moss mass at 0.25–0.5 inch intervals. The clear line is virtually invisible underwater and permanently prevents heavy moss canopies from lifting off smooth stones under strong filter currents.
Method 3: Growing a Christmas or Java Moss Carpet
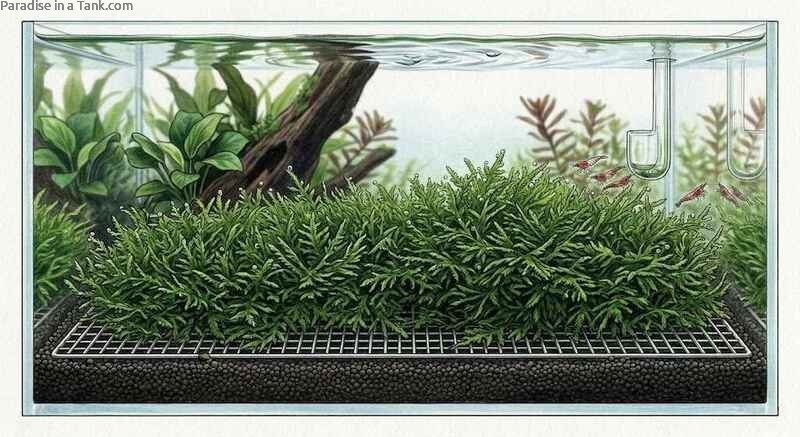
Creating a wall-to-wall green lawn across your aquarium floor without using high-maintenance stem plants is easy when you build a moss carpet frame.
The Mesh Technique
The most durable way to establish a moss carpet is by sandwiching your plant material between sheets of high-grade, food-safe 304 stainless steel mesh (typically 0.25-inch grid size).
- Cut two matching sheets of stainless steel mesh to your desired carpet dimensions.
- Spread a thin, even layer of chopped moss strands across the first mesh sheet, leaving no large gaps.
- Place the second mesh sheet directly over the moss layer, creating a flat sandwich.
- Bind the edges of the mesh securely using clear fishing line or small plastic zip-ties.
- Lay the mesh flat on the tank floor and weight it down at the corners with small pebbles or sub-surface anchor pins.
Over the course of 3–6 weeks, green shoots will push through the grid openings, completely covering the metal mesh beneath a thick, velvety green turf.
Placement & Lighting
Position your moss carpet in areas of your tank that receive direct light and active, sweeping water flow. While mosses are famously tolerant of low lighting (10–20 PAR), growing a dense carpet on the very bottom of the tank requires slightly elevated light intensity (30–50 PAR) to force lateral branching.
If lighting is too weak, the carpet will grow leggy, pale, and sparse as the strands stretch upward toward the light source instead of spreading horizontally across the mesh frame.
For a deeper dive into optimizing light cycles, nutrient balances, and preventing algae on delicate fronds, consult our complete aquarium moss guide.
Maximizing Growth Rate: Liquid Fertilizers and Water Flow
While mosses are incredibly resilient and can survive in basic setups, achieving explosive, vibrant green growth requires fine-tuning your water chemistry and physical flow dynamics.
- Targeted Water Parameters: Maintain water temperature between 68–77°F (20–25°C) and a stable pH of 6.5–7.5. Mosses thrive in cooler, slightly acidic to neutral water. High temperatures above 80°F (27°C) cause growth to stall and fronds to turn brown.
- Controlled Liquid Dosing: Mosses absorb nutrients directly from the water column through their leaves. Dose a comprehensive micro and macro liquid fertilizer weekly to maintain 10–15 ppm of nitrate and 0.5–1.0 ppm of phosphate. Avoid over-dosing iron, as excessive unabsorbed iron in slow-flow zones invites stubborn hair algae directly into the moss structure.
- Strategic Water Circulation: Ensure a steady, gentle current pushes across the moss beds. Continuous water motion sweeps away floating waste, prevents detritus from settling between fronds, and constantly delivers fresh dissolved carbon dioxide and vital minerals directly to the plant’s surface cells.
By maintaining clean, well-circulated water and anchoring your moss firmly to hardscape or mesh frames rather than smothering it in substrate, you turn a fragile aquatic plant into a thriving, low-maintenance centerpiece for your aquascape.